Drury is the wireless network for the non-residential areas of the Springfield campus. Below are guides on accessing the Drury Wireless network on your Windows 10, Mac OS, Android or iOS devices.
Click on the wifi icon in the bottom right corner of the screen to access the list of available wifi networks.
Once selected, all available networks will appear. Select “Drury” from the list, it should be near the top.
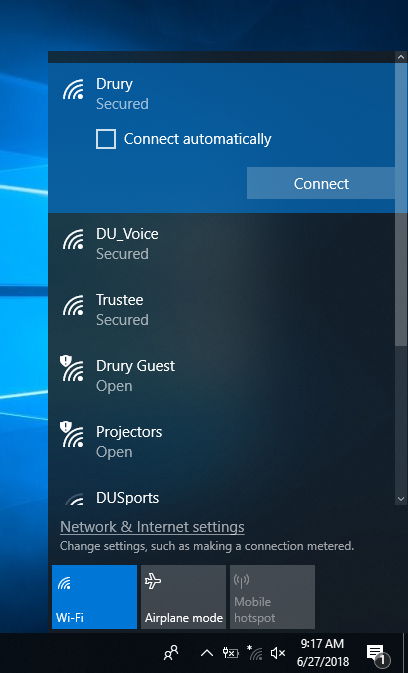
Then click “Connect” and Drury’s wifi will attempt to connect to your device to the Network.
A prompt will then pop up, asking for a username and login. This will be your Drury username and password.
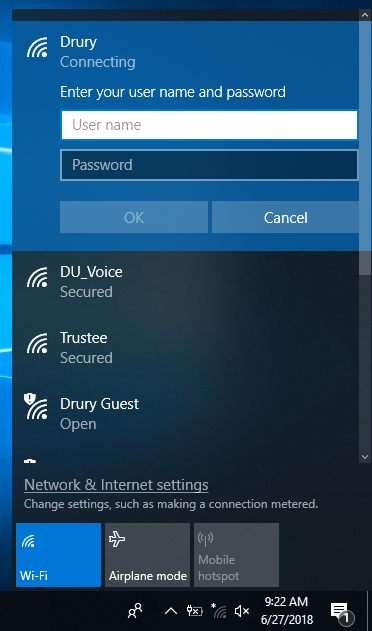
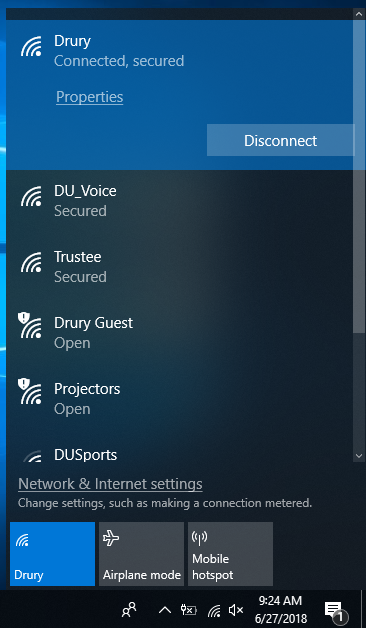
Once a Drury username and password is entered, the device will then be connected to the Drury wireless network.
Go to Settings, Select Network & Internet, and turn on Wi-Fi.
Select Drury from the list.
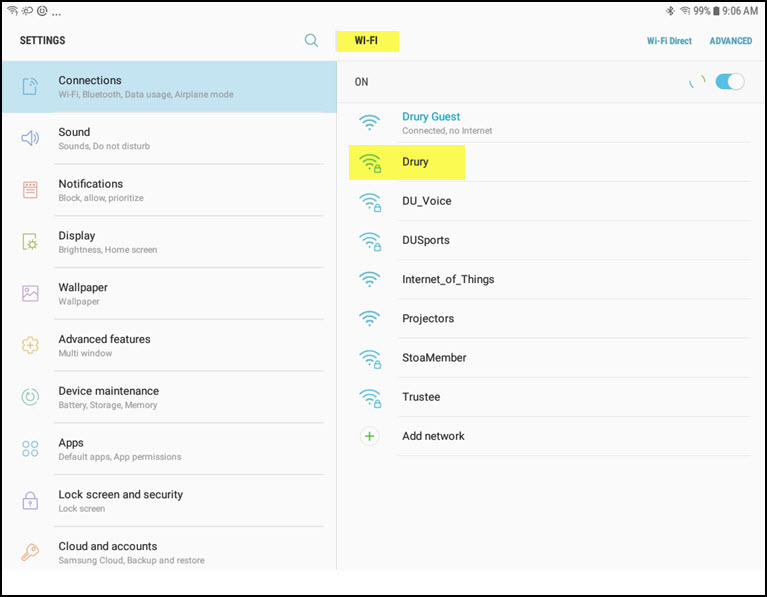
On the Drury settings screen enter the following:
| EAP Method | PEAP |
| Phase 2 Authentication | MSCHAPV2 |
| CA certificate | Don’t validate |
| Identity | Drury username |
| Anonymous identity | Leave blank |
| Password | Drury password |
Click Connect.
If “CA Certificate: Don’t Check” isn’t an option:
| EAP Method | PEAP |
| Phase 2 Authentication | MSCHAPV2 |
| CA certificate | Use system certificates |
| Online Certificate Status | Do not verify |
| Domain | drury.edu |
| Identity | Drury username |
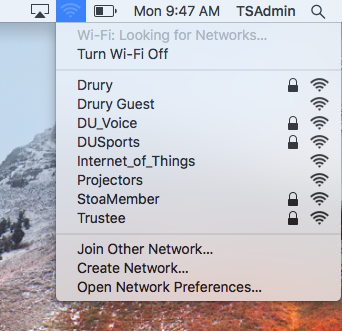
Click on the Wireless Icon located at the top of the screen.
![]()
Click to select Drury.
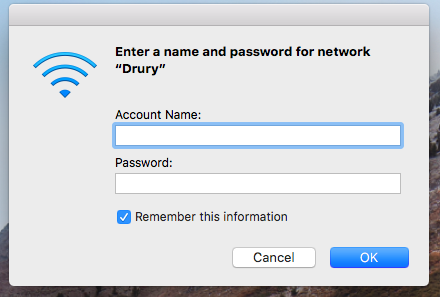
Enter your Drury username and password and click Join.
If you see Authenticating to network “Drury” click Continue.
If the Keychain prompts to save your password, click Cancel.
You should be connected to the Drury wireless network.
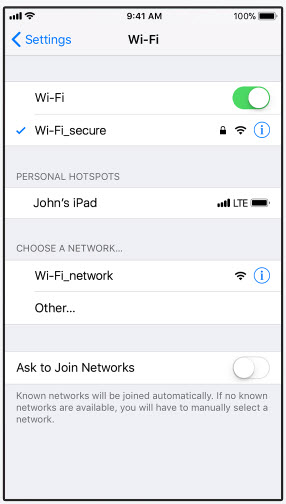
Click on the Settings icon.
Click on Wi-Fi.
Click to select Drury.
Enter your Drury username and password and click Join.
Click Trust on the Certificate prompt.
You should be connected to the Drury wireless network.
Students print on campus through PaperCut. Each student has an allowance of 600 pages of free printing per semester. Amounts over 600 pages are charged to the student’s account at a determined cost per page and must be paid by the end of the semester. A record of the sheets printed and any balance due is available from the PaperCut menu described below.
Students may print from computers in the labs, FSC and Olin Library, or they may print from laptops and other devices using the wireless printing function. To use this function, the device must be connected to the Drury wifi network. Campus printers cannot be accessed from an off campus network or from the MyResNet network. However, dorm printers use email and may be accessed from any network.
Olin Library
Olin Library First Floor Printers
Olin Library Second Floor Printer
Findlay Student Center
Springfield Hall Labs
Printing in the Dorms
Printers in the common areas of Sunderland, Wallace, Smith and College Park will print documents attached to emails from a Drury email account. The entire document will print; there is no option to select pages. Emails may be sent from any wifi connection.
The four email addresses are:
Students may access the wireless printers on the main Drury campus if connected to the Drury network.
Start in a browser and search for https://printing.drury.edu. The entire URL must be typed, including the “https://” prefix.
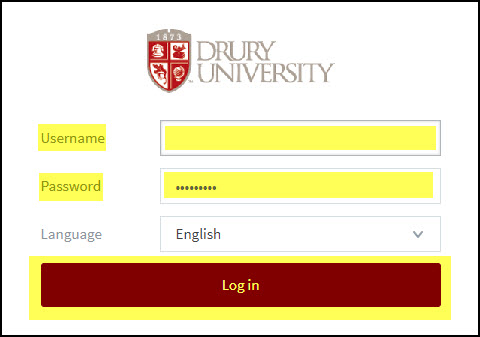
A window for a Drury username and password will appear. Enter a Drury username and password and click Log In.
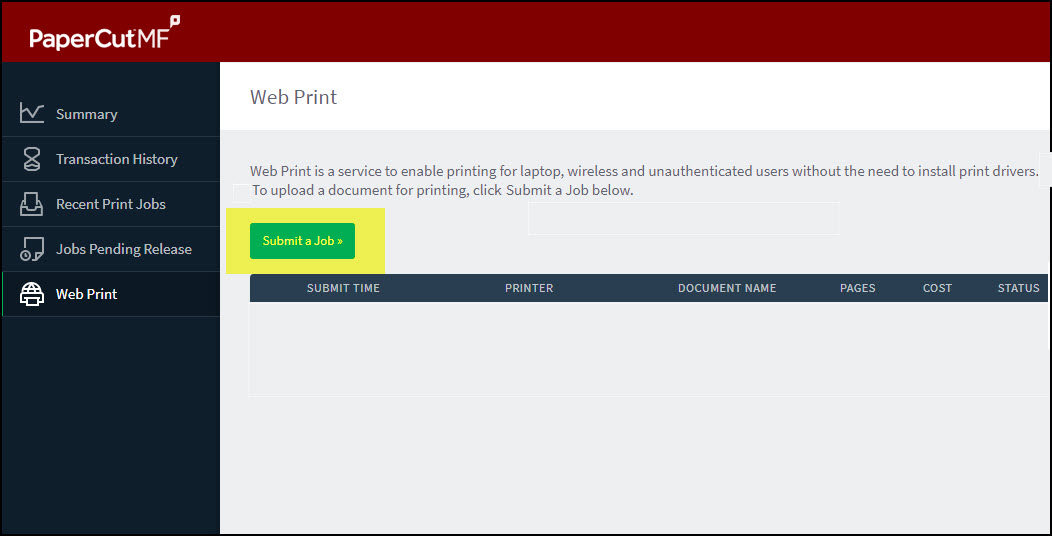
On the Web Print screen, click on the Submit a Job button,
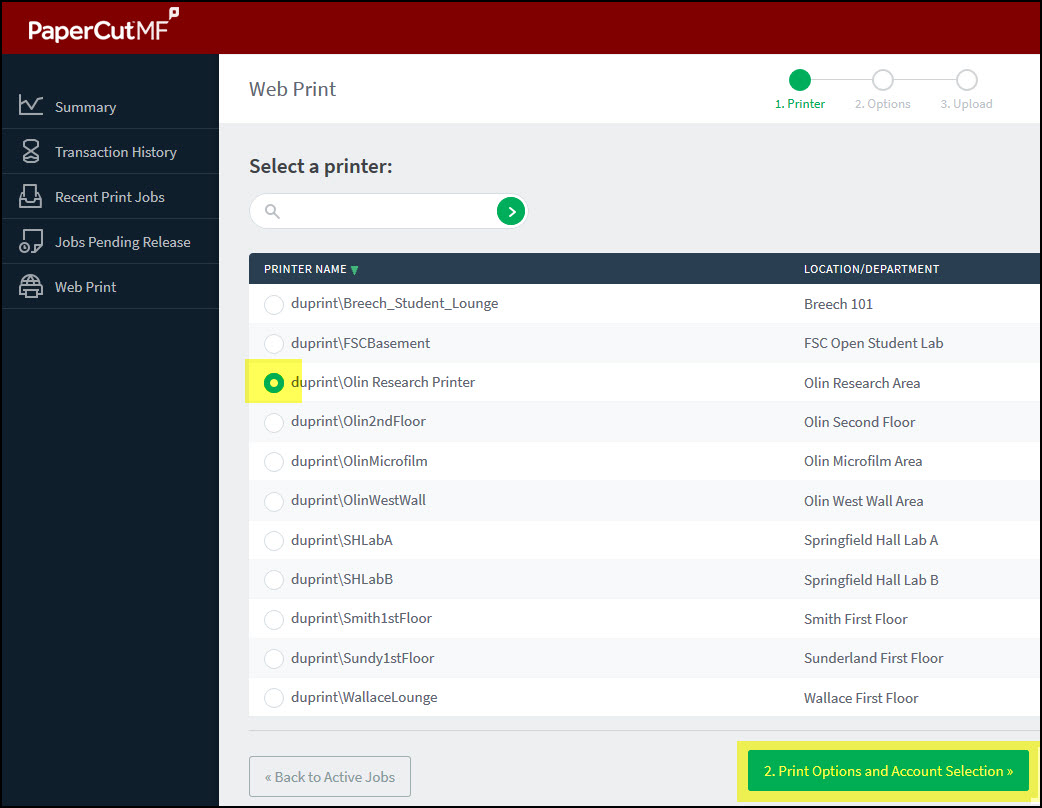
A list of the wireless printers will appear. Click on the radio button next to the one to be used and click on the Print Options & Account Selection button at the bottom of the screen.
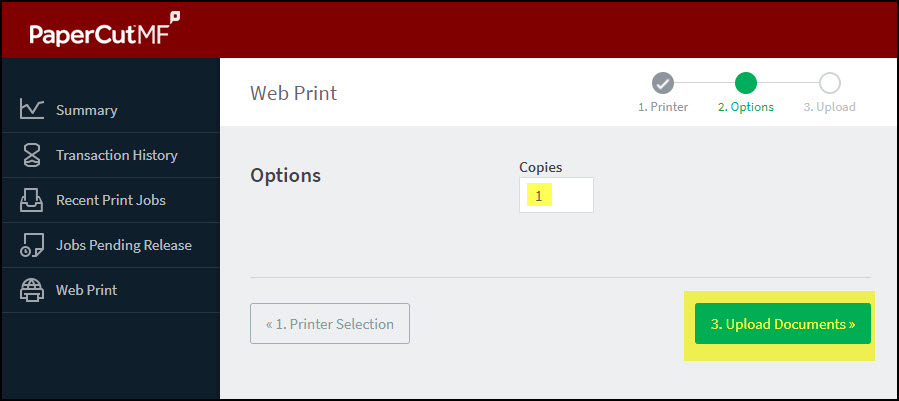
On the Options screen, select the number of copies or leave the default at 1 and click the Upload Documents button.
On the Upload screen, drag and drop the document(s) to be printed, or click on Upload From Computer to select the file from document storage.
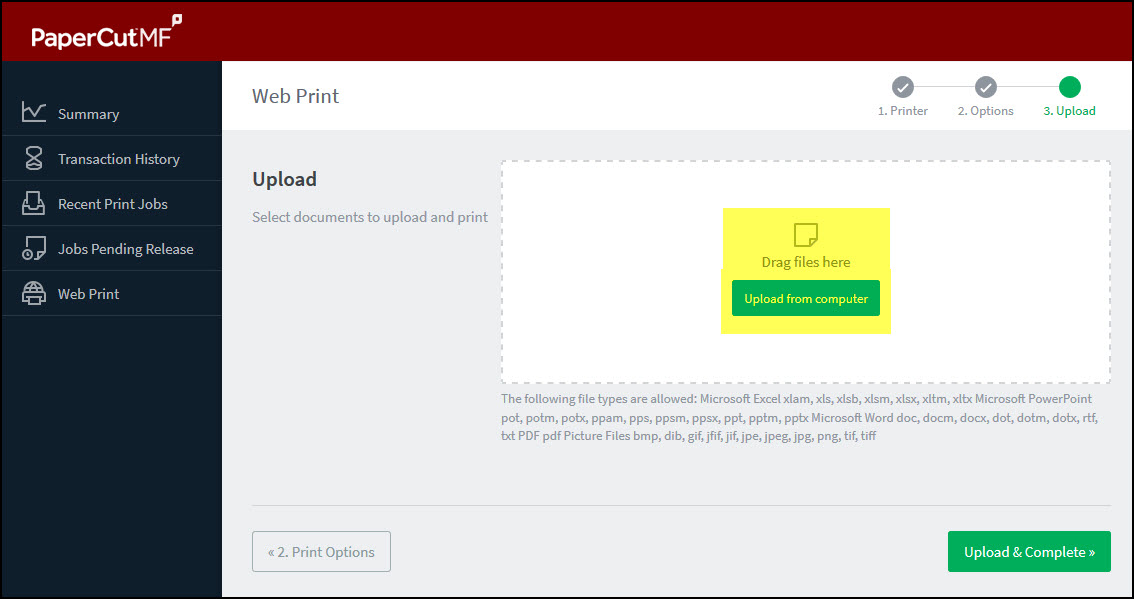
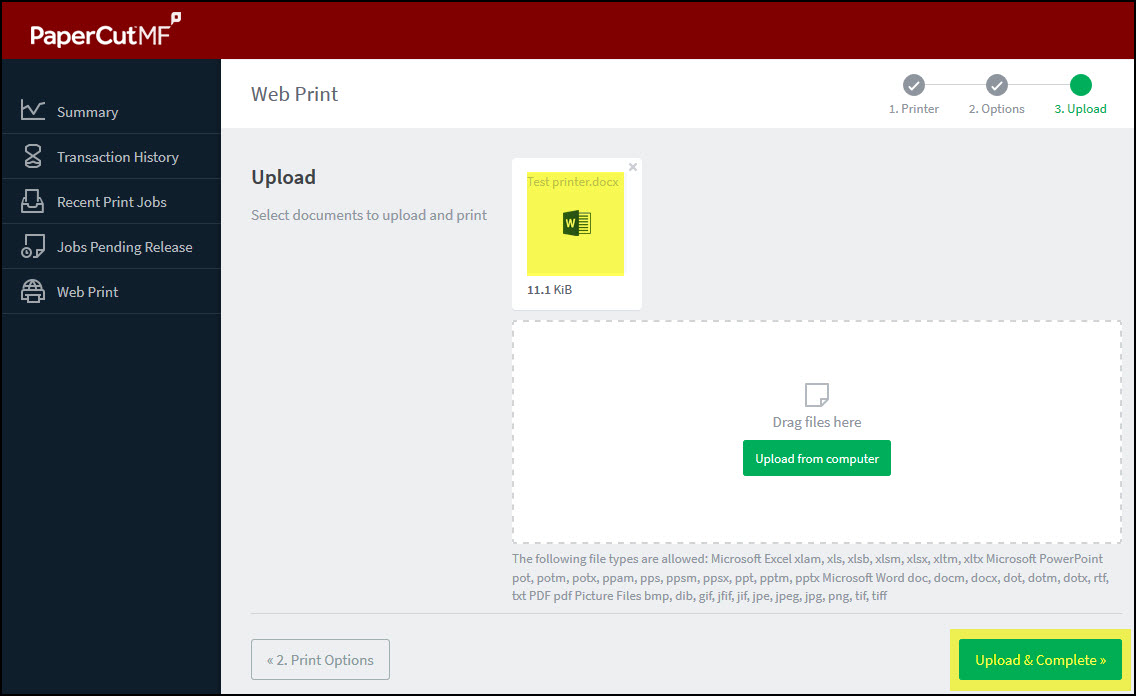
Once it’s selected, an icon for the document will appear above the drag and drop box. Click the Upload and Complete button.
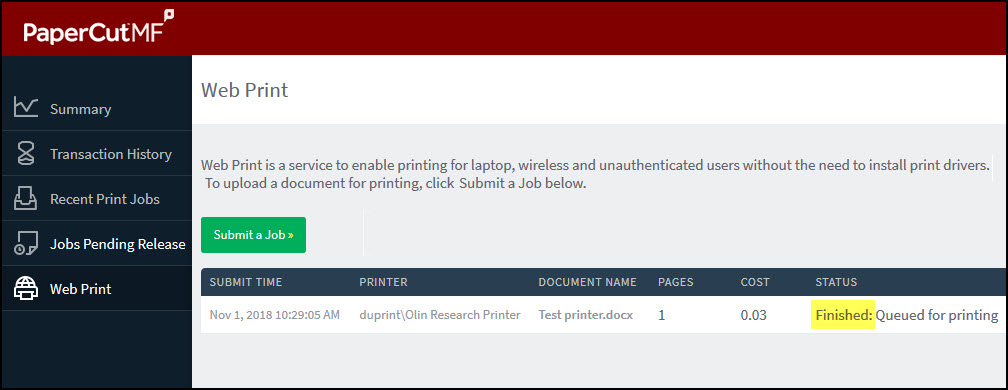
The screen will return to the first screen but it will include a notation of the status of the print.
Click on the Summary section to see a record of sheets printed and a balance due, if any.

Drury has computer labs on all campuses for student use. A Drury username and password are required for access.
The labs may be reserved for academic activities (class, testing, etc.), at which time they will be closed to other users. Schedules of classes held in the lab each semester are posted at the entrance to each lab.
Springfield Hall
All labs in Springfield Hall are located on the second floor and are open 24/7 unless the campus is closed due to holidays or weather.
Lab A:
Computers: 25 and instructor’s workstation
Platform: PC (Windows 10)
Lab B
Computers: 16 and instructor’s workstation
Platform: Macintosh (OS X)
Findlay Student Center
Location: FSC Basement
Computers: 4
Platform: PC (Windows 10)
Hours: Same as Findley Student Center hours.
Olin Library
Location: First and second floors
Computers:
Platform: PC (Windows 10)
Lay Hall
Computers: 24
Platform: Macintosh (OS)
Ava (MOCH)
Location: Student Lounge
Computers: 7
Platform: (Windows 11)
Monett
Lab A
Computers: 16 and instructor’s workstation
Platform: (Windows 10)
Lab B
Computers: 12 and instructor’s workstation
Platform: PC (Windows 10)
Lab C
Computers: 18 and instructor’s workstation
Platform: PC (Windows 11)
Rolla
Location: Lab B (Student Lounge)
Computers: 10
Platform: PC (Windows 10)
Location: 2 at the Front Counter
Platform: PC (Windows 11)
St. Robert
Location: Library (Student Lounge)
Computers: 7
Platform: PC (Windows 10)
Voicemails may be accessed from your Cisco account on the internet.
Enter this link in your browser: https://10.243.10.33/inbox
You may see the screen below. If so, click on Advanced:
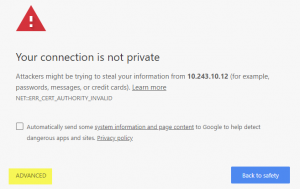
From the next screen, click the link at the bottom to proceed to the CISCO website:
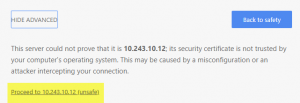
Enter your Drury username and password to see your voicemails.
Change your PIN and forward calls from the Self Care Portal.
Conference phone requests are made to helpdeskticket@drury.edu.
Requests should include:
Faxes may be sent from campus using XMediusFAX.
Go to the XMediusFAX website. Please use Internet Explorer or Firefox as the website will not function correctly using other browsers.
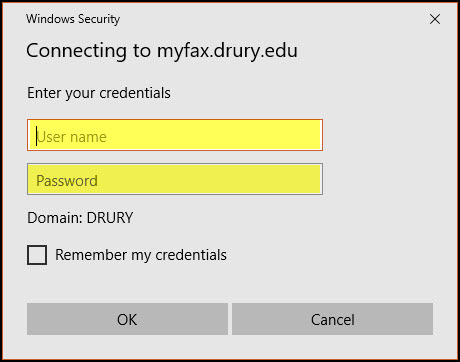
Enter your Drury username and password in the security window.
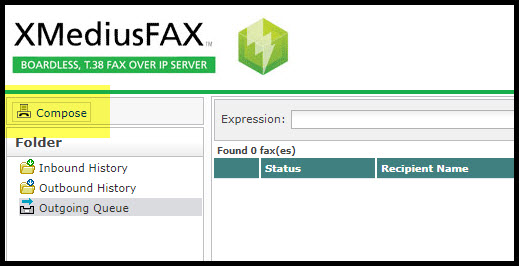
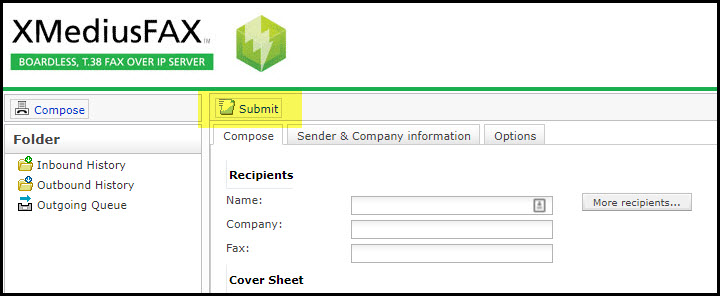
On the XMediusFAX home page, click the Compose button at the top left.
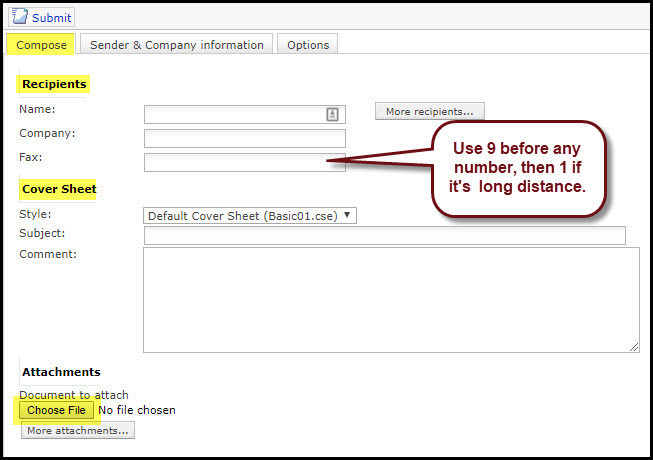
On the first tab, Compose, enter the name(s) of the recipients and the fax number.
***Be sure to use “9” before any fax number and “1” if the number is long distance.
A coversheet with a subject and comments is an option.
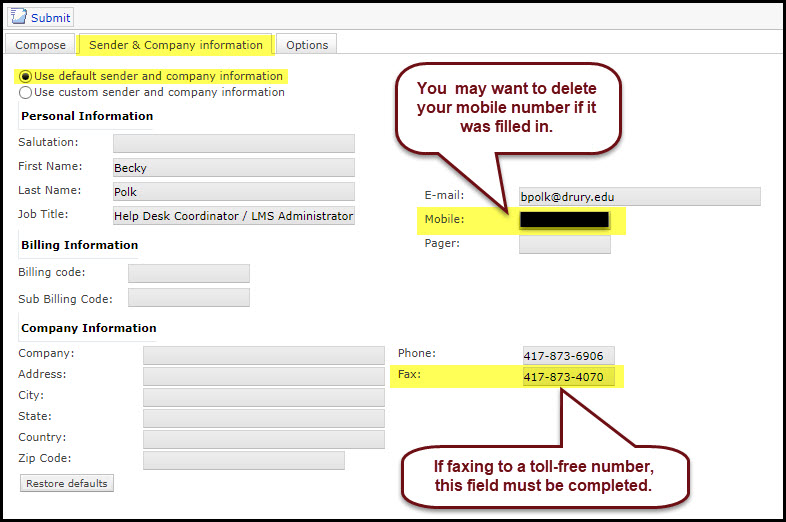
Click on the second tab, Sender and Company Information, to verify or edit your information.
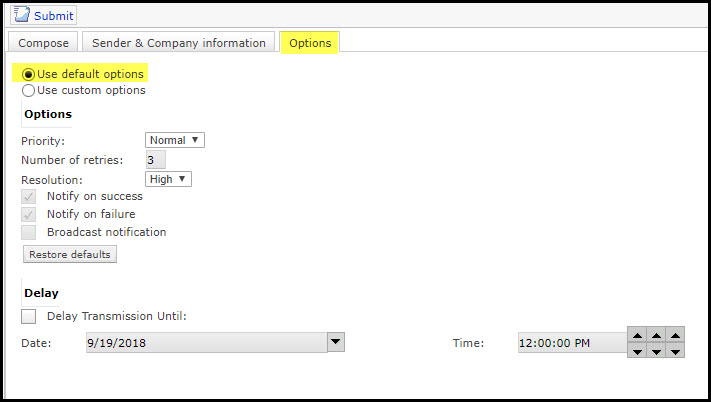
The Options tab defaults to standard settings, but enables you to change the number of tries if the fax line is busy, or set a delayed time for the fax to be sent.
When all information has been completed, click the Submit button at the top of the screen.
When a Drury password is changed through MyDrury, the password on all network-connected Apple applications/devices needs to be changed as well. To do this, the old Keychain must be deleted and a new one created.
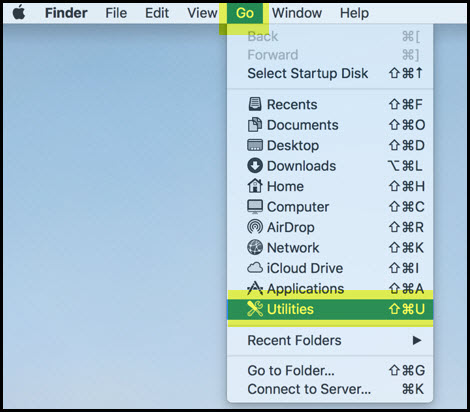
Open Finder and be sure it’s selected in the top header.

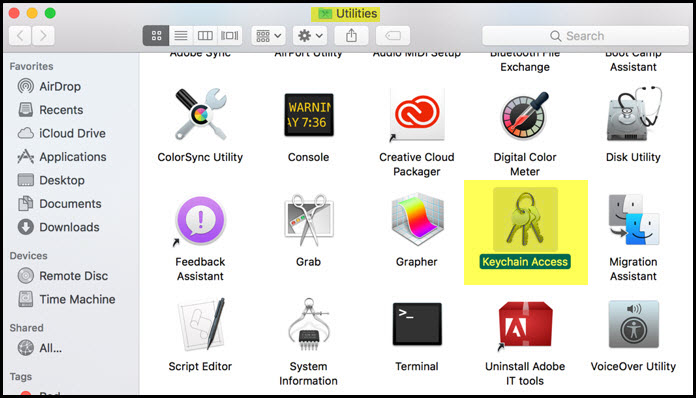
Click on Go in the top header and select Utilities.
Find Keychain Access and double click it.
Find the printer needing the password change, right click on it and select Delete (printer name). This does not delete the printer, only the keychain.
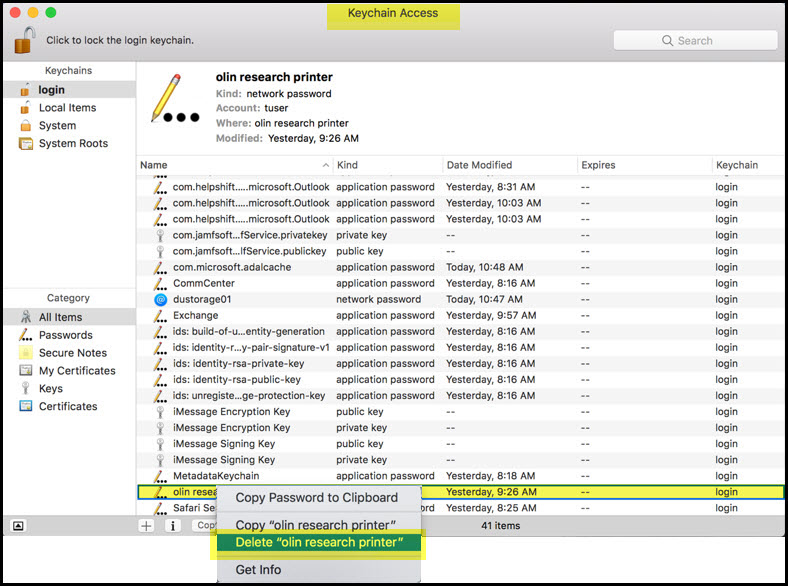
The first time the selected printer is used, a Drury username and password will need to be provided.
Whenever a Drury password is changed, it must also be changed in two email areas on a Mac.
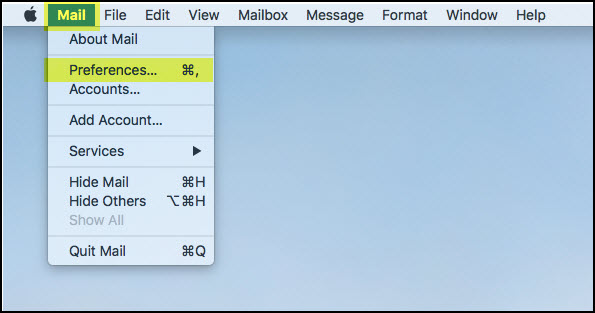
Select Mail from the icons at the bottom of the screen then click on Mail on the top header and select Preferences.
Click on Accounts from the Preferences screen, then on Server Settings.
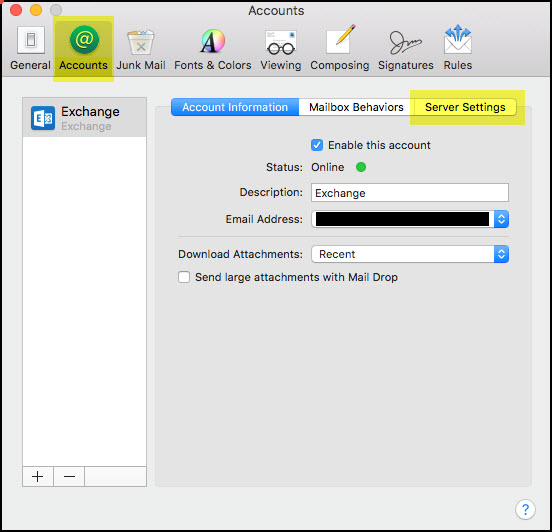
On the Server Settings screen, enter the new password in the bottom field.
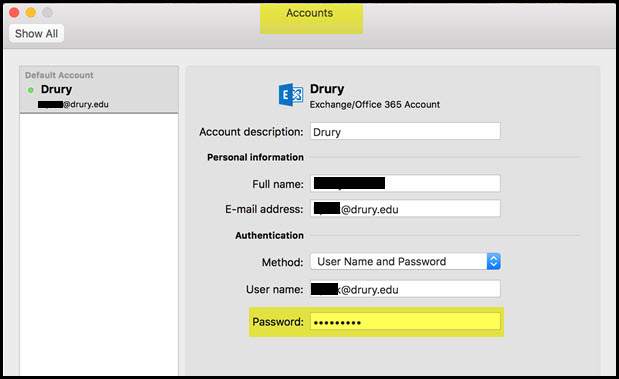
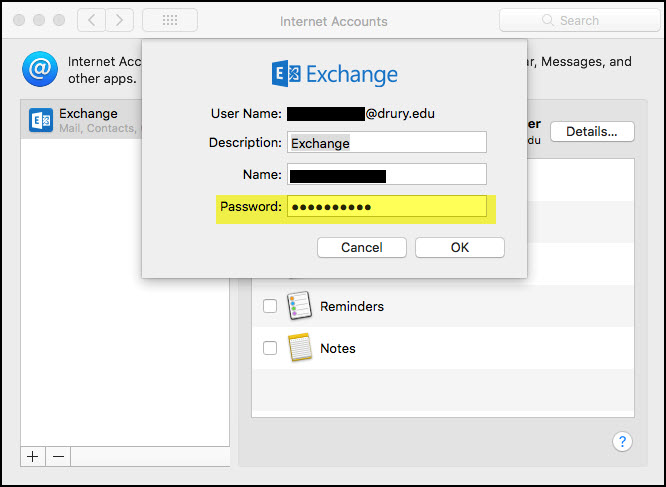
The second place on a Mac where the password needs to be changed is Accounts section.
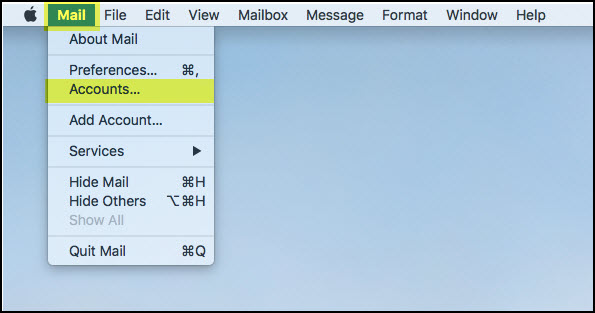
Select Mail from the icons at the bottom of the screen, click on Mail on the top header and select Accounts.
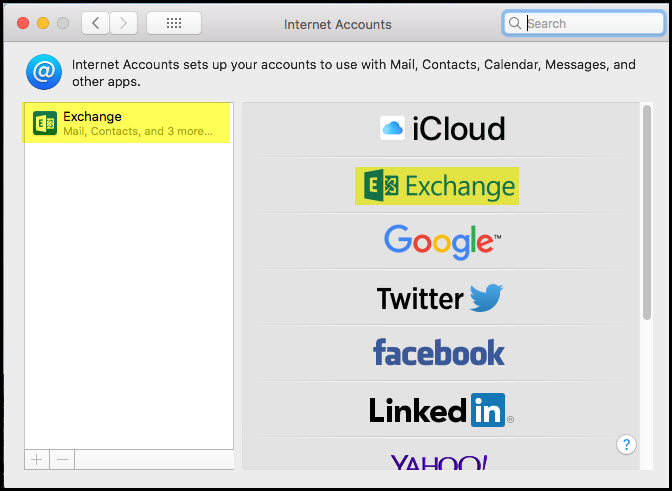
Click on Exchange to find your email address.
From the Exchange screen, click on Details.
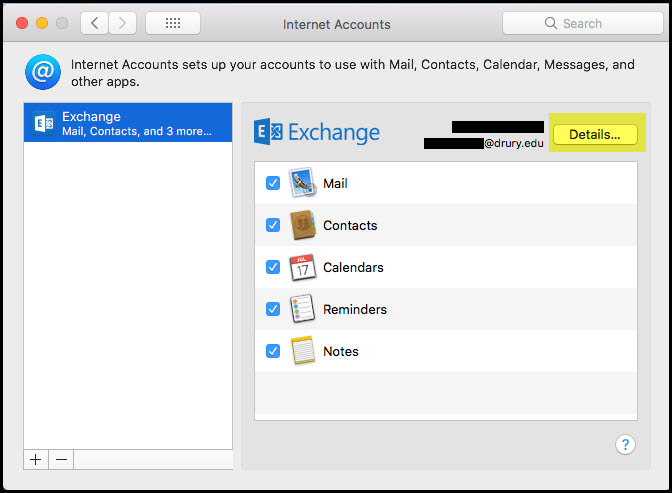
In the Details window, enter your new password in the bottom field and click OK. You must then quit Mail and reopen it .
