
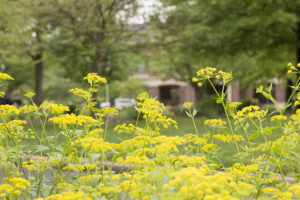
 Collecting native plant seeds
Get seeds from established plants. Selective collection of seeds from an area with a sizable group of wildflowers will have little or no effect on their reproduction.
Although wildflowers may be obvious in bloom, they often become hard to find by the time seeds are mature, so some advance scouting and marking may be necessary. Then you may need to keep a careful eye on developing seeds, to pick them after seed heads begin to brown but before seeds drop out.
Seed stalks are best left on the plants for at least a month after flowering.
Determining Viability
After collecting seed structures, open them to examine seeds contained. Seeds come in many different forms and sizes but will generally be fairly plump and firm if they are viable. Some plants may not produce seeds if conditions have not been favorable during the pollination or development stages.
Dormancy / Storage
Many wildflower seeds have a dormant period and will not germinate immediately. However, if planted promptly after harvest, this dormancy may not develop and rapid germination will occur. In the tables where midsummer or early-fall planting is suggested, this means prompt planting after harvest of the seeds.
If dormancy is natural or does develop, chilling is necessary before germination can be completed. Summer or fall planting is one way to fulfill these needs easily. Seeds that require chilling will not germinate in fall but will germinate early in spring.
Stratification / Breaking Dormancy
Some seeds have a hard coat that must break down naturally in the soil before germination can occur. Hard seed coats are often found in plants of the legume family. Scarification can speed germination – filing a small area on individual seeds; cutting a nick into the coat with a knife; or treating with acid. Many techniques can be used, but nature will do the job if given time.
Successful seed sowing will lead to a full garden with a balance of the species selected represented through the garden. A few simple steps can ensure an even distribution
of seeds over a large area:
 The seed coat, though extremely hard, permits the kernel to absorb water rather freely. By the time the kernel after-ripens and is ready to resume growth, the hard seed coat cracks along the edges and, thus, presents no obstacle to the growing embryo.
Collecting Nut Seeds
– Hickory – The seeds of most hickories are dormant. collected in the fall and the shucks removed
– Black walnut – when ripened and shed from the tree, is dormant. Walnuts should be collected in the fall and husks removed. Collect walnuts after they fall to the ground. Remove the husks, then place the nuts in water. Those nuts that float on the water are not viable and can be discarded. The good, viable nuts will sink to the bottom.
Which seeds are good?
Sort out any cracked or insect-damaged nuts
Place the walnuts in water. Those that float are not viable and should be discarded; use only the nuts that sink to the bottom.
The cold-moist requirement can be met by planting the nuts in the ground in fall. Plant the nuts .75 to 1.5 inches deep. Stratification requirements depend on the species and, to some extent, on the origin of the seed.
Prior to stratification, hickory seeds should be soaked in water for two days to four days. Water should be changed once or twice per day to eliminate tannins
Or: stratify by placing the nuts in a moist mixture of sand and sphagnum peat moss and then storing them in a cool location. Suitable containers include coffee cans, plastic buckets, and food storage bags. The refrigerator is a good storage location. (Stratification temperatures should be just above freezing.) stratification requirement of nuts of the most common Oklahoma hickories is three months at 33 F to 50 F.
Black walnut seed after-ripens in stratification at 33 F to 50 F in three months.
Planting
Fall planting of hickory nuts is used very successfully, provided the nuts are well protected against rodents and severe freeze.
Walnuts can be planted in the fall or stratified and planted in the spring. Walnuts should be planted 1 to 2 inches deep.